
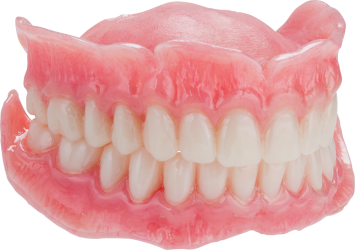
 Using your traditional techniques for capturing information for a denture. We produce a 3d printed Try-in denture to check fit and function. After everything checks out we print out the gingiva structure, insert Premium Denture teeth(Mondial) and using the latest denture techniques we inject high-quality premium acrylic into the mold.
Everything is manufactured in-house, so turn around times are extremely fast. Stewart Dental Laboratories is one of very few labs in the USA producing dentures this way. Initial Impression to Final Denture can be accomplished in as little as 5 working days. Option to go straight to Final reduces the price an additional $10. Overdenture and Immediates are available as well. On immediates there is nothing to try-in so those go straight to final prosthesis.
Steps for Fabricating a InHouse Digital Denture
1. Take 1st impression using a stock tray specifically designed for edentulous patients with alginate impression material. Stock tray can be extended using wax build up on the tray border.
If utilizing an interoral scanner, the intial scan be performed for Custom Tray. It is very important that as much information is captured as possible Custom Trays fabricated in house do not require a printed or milled model and will done all digital.
2. Recommended but an optional step: Custom tray will be manufactured off the initial impression. If scanning all custom trays are made.
3. Take the master impression using custom tray with PVS or polyether. We recommend Kulzer PVS Flexitime but use whatever you feel comfortable using.
4. Send impression back for fabrication of the wax rim.
5. After receiving the wax rim setup confirm fit and extension of record base. Contour wax rims for lip support, future incisal edge position, occlusal plane, occlusal vertical dimension, centric relation, and midline. Set the wax rim with bite registration at correct vertical dimension. Select tooth mold, tooth shade and desired occlusal scheme. A few helpful videos are listed below:
Using a Wax Rim by Mark Durham
Assessing Vertical Dimension(VDO,VDR)
6. Return all items back the lab where we will index and mount casts. Case will be scanned in and designed digital using CAD software with premanufactured tooth molds that were pre-selected by the patient.
7. Your office will receive a white(future colors and indications will vary) 3d-printed digital denture try-in set-up which will be used in place of the traditional teeth set in wax. Evaluate for accuracy; occlusal vertical dimension, esthetics and phonetics. Perform modifications as necessary. Patient and clinician should be satisfied before moving to next step.
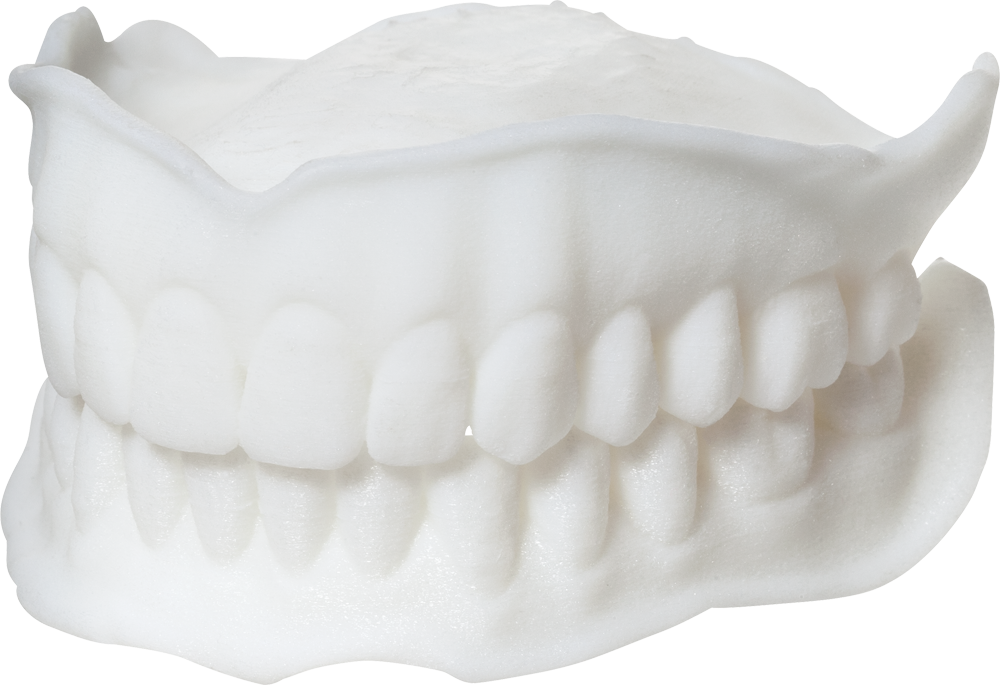
If any revisions needs to be perfomed use the Digital Denture Try-in as custom tray by removing some of the material before reimpressing. If nothing was changed or adjustments were made to the Try-in then the Digital Denture Try-in can be kept by Clinician or Patient since it is not needed for final fabrication.
8. Return all items back to the lab if modfications were needed for prosthesis fabrication. Another Tryin will be fabricated if requested by the clinician/patient. Otherwise the lab will proceed forward.
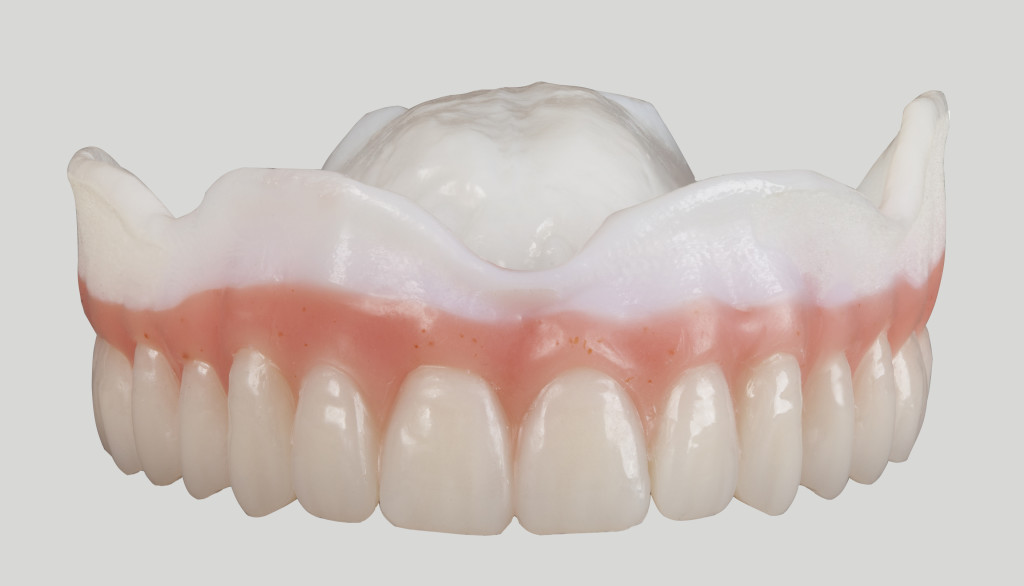
9. Dentures will be injected using high-quality premium acrylic with Premium/Standard teeth per patient/clincian intial choice. Dentures will be returned finished and all external surfaces polished w/ name inset if state requires it.
10.Insert dentures and adjust as necessary. Please use your standard recall interval for following post insertion.
A typical post insertion follow-up includes 24-hour, one-week and one-month appointments.